Fresh start for the cabby's interior
Written on April 30th, 2022 by sudoyashi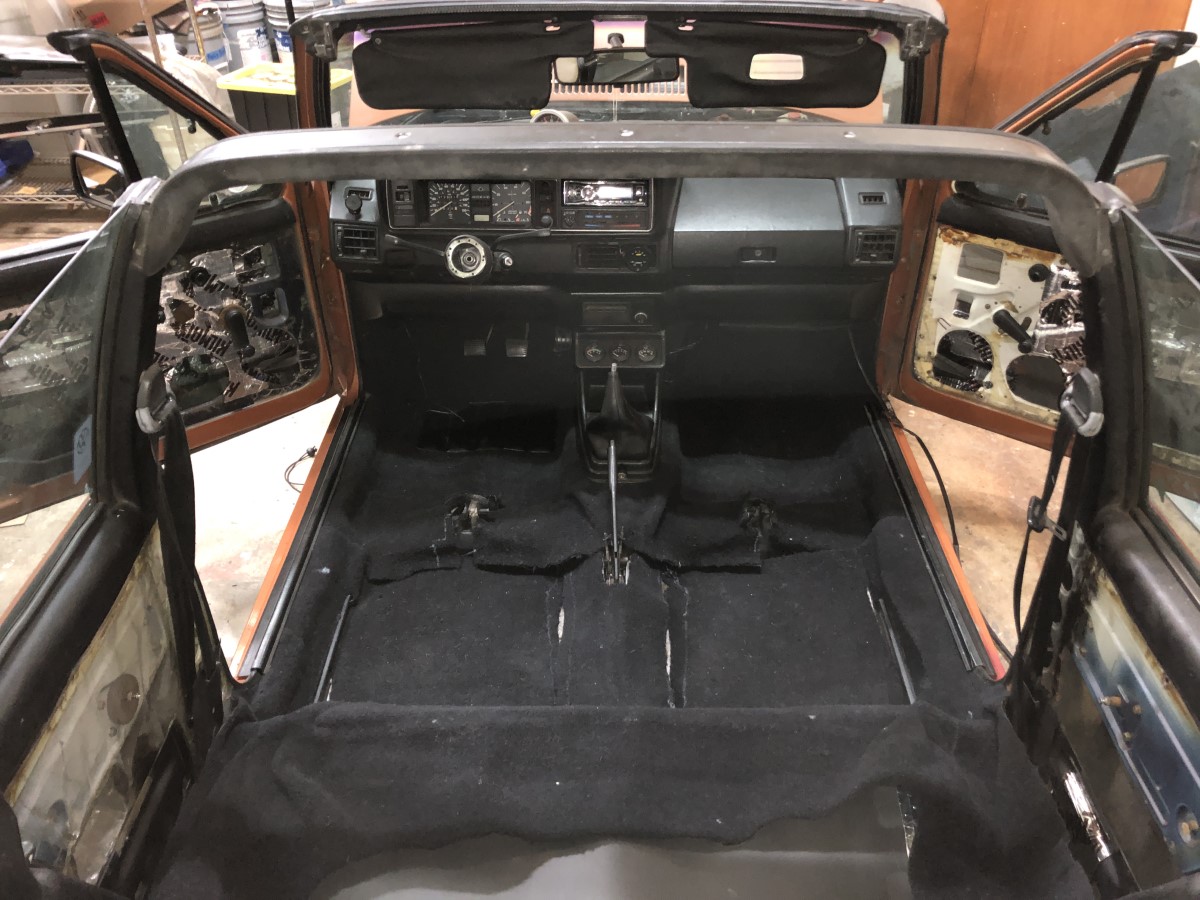
I started to redo the interior on March 7, 2022. Having the ability to put the car into a closed garage has been a godsend in the house I’m living in right now.
Originally, I would be wrenching outdoors and would have to pop up a tent when I wanted to work on the car the whole day! With pets, kids, and 5 other cars in the driveway, it wasn’t ideal to be working on the car all day. Since moving, it has allowed me the time, space, and environment to focus on my car without worrying about everyone else.
How long did it take? 50 hours over 3 weeks.
From start to finish, this took me over 50 work hours.
- Remove door cards, shift boot, VDO gauge cluster, seats, and other fixings
- Removing the old carpet and anything that was rotting underneath
- Remove old butyl with dry ice and hammer
- Clean, remove and patch any holes
- Repainting to prevent rust
- Install kilmat, sound deadening butyl
- Install closed-cell foam
- Install cut and place mass-loaded vinyl
- Cut, place, and install new carpet
It was incredibly tough to get everything put together and push myself to finish this project. Initially, I didn’t think it was going to take over a month, but because of my birthday, the flu, and other life events, I had to put off the project for a bit. Was it worth doing it on my own versus taking it to the shop? Yes, absolutely.
This car is NOT going to be a major show car, so I could cut corners and pay the price later. As much as I love this car, it is not a relic to stand the test of time. There are MANY other examples of better Golf Cabriolets out there so I am not inclined to save this car and keep it stock. I have no intention of doing a full restore, that’s too much money haha.
The Cost: $760
On all the materials, not all tools: ~$760
| Item | Price |
|---|---|
| Carpet | $180 |
| Kilmat 36 sq.ft (2) | $120 |
| Closed Cell Foam Noico Red | $120 |
| Mass Loaded Vinyl 25 sq. ft. | $80 |
| Rollers | $20 |
| Aluminum Insulating Tape | $20 |
| Die grinder + supplies | $115 |
| Dry Ice | $30 |
| Metal body filler | $40 |
| Butyl cord | $15 |
| 3mm plastic sheeting | $19 |
| TOTAL | $759 |
In my case, I went nearly full teardown and buildup. I would have spent more on welding and bigger patching materials if I had the income to do so, but I decided to go with metal body filler instead.
The biggest costs were obviously in the materials: carpet and sound deadening. If you are reusing your carpet, great! You save about 20% of the costs. If you are not installing sound deadening and just replacing the carpet, that is about 70% of my total costs.
I could have saved some money on some materials, but it may not last as long. I could probably future-proof this car by doing proper metal repair and professional installation, but it defeats the purpose of a project car on a budget.
Of course, buying new tools would make this cheap project go up real quick. This also assumes you have an air compressor, grinder, mallets, buckets, and cleaning supplies as well.
Lastly, body condition and other pieces you need to buy and replace will be a variable.
The Process: Expedited
Removing the Interior Remove door cards, shift boot, VDO gauge cluster, seats, and other fixings
Basically, all the interior pieces that you can get your hands on that you WANT to remove. The biggest obstacle for any DIY project is no one is going to make you do anything.
Remove the parts that you can reliably put back on or have the confidence to do it slowly and carefully so that you don’t break your car even more. This also means tools!
Buy tools that you can get your hands on if it is going to save you a lot of time. This includes interior trim tools, trim pry tools, a variety of screwdriver sizes, and scrap material to use as buffers, backings, and protection. This would be cardboard, plastic sheets, dust covers, etc. to cover the good parts of your car.
On to actually removing the pieces, read on!
VDO Gauges + Shift Boot
The VDO gauges and shift boot are packaged together. Remove the two screws underneath the dash, one on the driver and passenger side. Remove the main Phillips screw right between the boot and e-brake. Remove the shift knob.
Lift up from the side next to the e-brake and tilt the assembly down. Shimmy the plastic out from underneath the dashboard, you will also slowly lift the shifter boot out of the shifter. Continue to shimmy out slowly, watching your wires connected to the gauges. Once it’s mostly free, turn it to the passenger side and check your wires. Disconnect and label the connectors and lights. It’s pretty easy to figure out by distance of the wires, but less guessing, more wrenching.
Seats
The front seats will be challenging the first time you do it.
Pull the seat back all the way. Underneath the front of the seat, closer to the engine bay, there is an M6 bolt and acorn nut (unless there wasn’t one, like mine). Remove those fasteners. Carefully slide out the seat until it comes off the rails. Repeat on the other side.
There are several smaller parts to pay attention to:
- Rubber center bushing; buy replacements
- Plastic seat slides; buy replacements
- Seat adjustment lever spring; buy used, wrap up your own spring, or buy a suitable extension spring
- Seat adjustment lever locking pin; buy replacements
The rear bench seat is held down by two Phillips head screws, I lost mine so I replaced them with these spare metal screws that fit the bill.
Remove the screws, then carefully lift up the bench. The seatbelts will reveal themselves in the left and right corners.
To remove the rear seat back, there are two large Phillip head screws on each side, you want to get a longer screwdriver to get a lower angle of attack so as to not strip the head. Remove the seatback.
Front door cards
Start with the armrest. There are two Phillips head screws underneath, remove them. Lift the armrest enough where the angled portion is parallel to the ground, then gently pull it out of the door.
Remove the screws from the speaker grille then gently pop them off. If you have the stock speaker, it will be screwed into the grille. Remove the speaker wire from the speaker.
Pop off the interior handle backing on with a flathead, then pull out the entire cupped part. The handle will remain.
To pop off the window crank, you may have to either peel off the handle crank plastic or pop it off.
Here they are both: This will reveal the screw. Remove it and SLOWLY remove the crank. There will be geared washers, look for the orientation and set them aside.
Check your card for any other fasteners and screw covers. Review the whole card and take pictures to remember where the screw goes where.
Take an interior pry tool and start prying off the door jamb, working our way from the rear to the front of the car. Follow the perimeter. If something feels incredibly forced, you may have forgotten a screw. Once you’ve gone around the whole thing, it should come off. Take it off slowly to not disrupt any critters living inside, probably.
Rear door cards
The rears are much simpler. Remove the window crank, again either by popping off or peeling off the trim, then remove the screw. Peel away the weatherseal around the driver and passenger door near the door card. Release the seatbelt plastics that are covered.
Again, use an interior pry tool to pull out the plastic fasteners, and start on the side closest to the engine bay. Keep pulling away and it should be free. Note that the card sits on these edges.
Other pieces
Your seatbelts are held in by a single bolt, unfortunately, I can’t tell you the order of these washers and parts since mine were very corroded. They are 17mm heads and apply to both the front and rear seats.
The doors (should) have plastic sheeting behind each door card, this is a moisture barrier and should be reinstalled or refreshed. I used a 3mm plastic sheet with household butyl cord to seal it back up. Not complicated, just takes time.
Removing the old carpet and anything that was rotting underneath
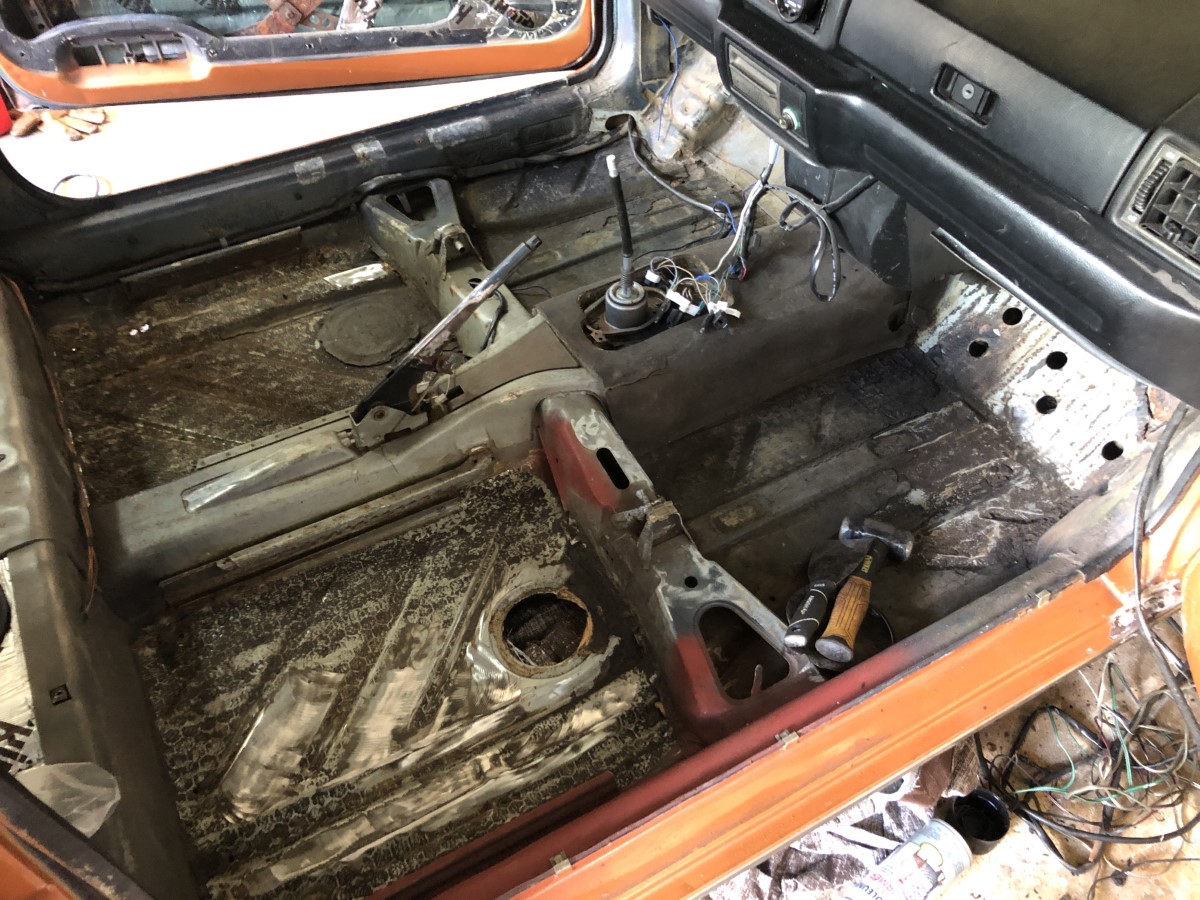 WOO. The main event. Time to see all the damage from previous owners, the elements, and time.
If it’s like most VW Golfs, the carpet is in two pieces for easier installation. I would recommend installing it this way. I gave up trying to install a single piece because my replacement carpet was not the correct shape.
Remove the rear carpet from the bench seats to the center. Slowly lift out and fold in to keep the dust/mold from falling back in. The carpet may be fastened down in some places by the doors, pull away and it should be fine.
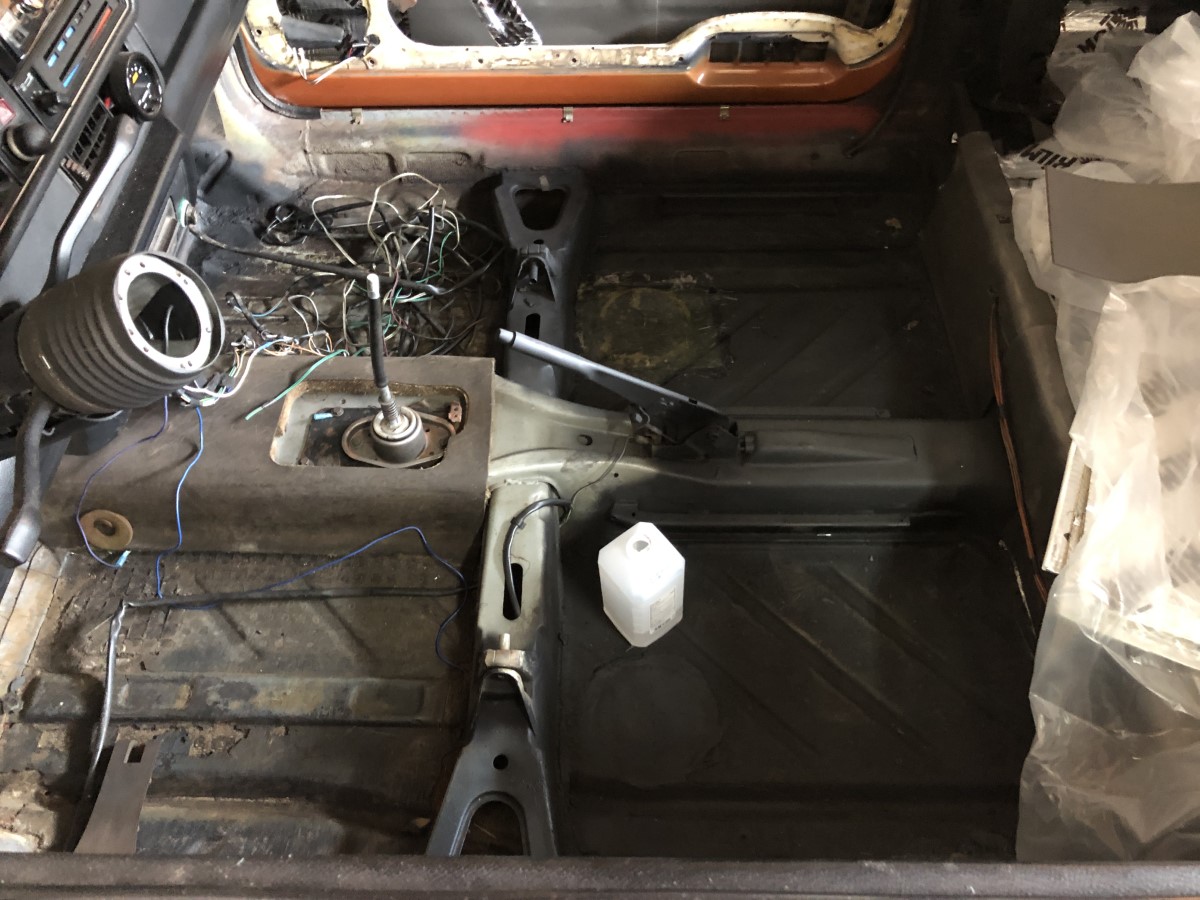
Next, remove the door sill trim and door sill carpet hold-down clips. Lift up the carpet to confirm any missing parts. You may find little gems from here on out. Next, lift out any original sound-deadening materials, the main one being the piece underneath the dashboard on the center “transmission” tunnel, where your shifter is.
Starting at the driver’s side, remove the two screws holding the hood release. Next, remove the throttle pedal foot stop. Next, straighten out any metal fold-down fasteners that hold down the carpet. Search for any other plastic fasteners that hold the carpet. Gently pull away.
Repeat on the other side, and search for fasteners and the metal fingers that hold down the carpet.
This is not a pleasant experience. Continue to pull away and check for any remaining fasteners. Pull out the front carpet.
Congratulations, wash your hands, my carpet was fuckin’ gross, and would not doubt yours wouldn’t be either.
Remove old butyl with dry ice and hammer
Time to remove any old sound deadening and other material. Note, there are international hole cutouts in the floor pans, do not simply bang away at them!
To remove the old black sound deadener, use dry ice. I got 10 lbs for the entire car. Pour the dry ice in ONE floor plan and let that sink in. I’d recommend gloves, eye protection, and a fan. Next, pour some isopropyl alcohol to accelerate the cooling effect. After about 5 minutes, take the remaining ice and swoop it over to the next pan. Pound the old rubber away and chunks should start flying. If you are dissatisfied, rotate all the way through and add more ice when you can.
Repeat until mostly clean.
This will identify the flaws in your metal. Find the rust and grind it away. Paint it and confirm your work. This is the last time you will get to see a bare floor. Inspect from front to back.